|
|
|
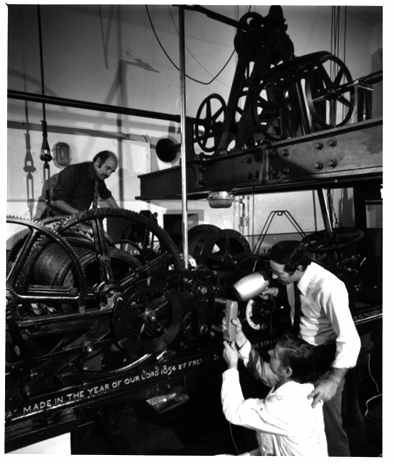
View of clock movement Image courtesy of AEA Technology |
The first thing to point out is that this picture was taken some months after the 1976 disaster had occurred while the Non Destructive Testing of the remaing parts of the clock movement was being carried out. If you familiarise yourself with the appearance of the movement from the other photographs you will notice that the space occupied by the chiming train towards the right of the frame is vacant, the chiming train had completely disintegrated! The cables from the quarter bell hammers may be seen to be terminating above empty space. At the left one can easily see the large winding barrel of the striking train. The very thick cable which operates the hammer of the Big Ben bell may be seen rising from behind it. In front can also be seen the notched countwheel which determines the number of strokes of the bell each hour. To the right may be seen the vertical shaft of the fly fan of the striking train and to the right again the relatively small winding barrel of the going train. There is a clear view of the bevel gears on the gantry above the movement and the shafts going out to the four dials. It is extremely difficult to see, but for those who know what they are looking for the famous double three-legged gravity escapement may just be seen to the left of the fly arbor above the spoke of the gearwheel. |